No More Green Yolks: The Quest for Perfect Hard Boiled Eggs
Hard-boiled eggs are a staple for many, whether destined for a quick breakfast, a nutritious snack, a vibrant salad, or the star of a creamy deviled egg platter. They seem simple enough: an egg, some water, a pot. Yet, how often have you cracked open a hard-boiled egg only to be met with that tell-tale, unappetizing green-gray ring around the yolk? Or perhaps a rubbery white, a crumbly yolk, or the frustration of a shell that simply refuses to peel cleanly? The pursuit of truly perfect hard boiled eggs can feel like an elusive culinary quest.
Fear not! Achieving consistently beautiful, creamy-yolked, easy-to-peel hard-boiled eggs is not a secret known only to professional chefs. It's a science, an art, and most importantly, a technique that anyone can master. This comprehensive guide will walk you through every step, revealing the simple truths behind avoiding common pitfalls and guaranteeing those picture-perfect, deeply satisfying results every single time. Say goodbye to green yolks and welcome a world of perfectly cooked eggs!
The Science Behind the Green Ring (and How to Avoid It)
Before we dive into the 'how-to,' let's understand the 'why' behind the most common hard-boiled egg faux pas: the dreaded green ring. That greenish-gray discoloration that sometimes forms around the yolk is not a sign of spoilage, nor is it harmful. It's a chemical reaction, a natural consequence of overcooking.
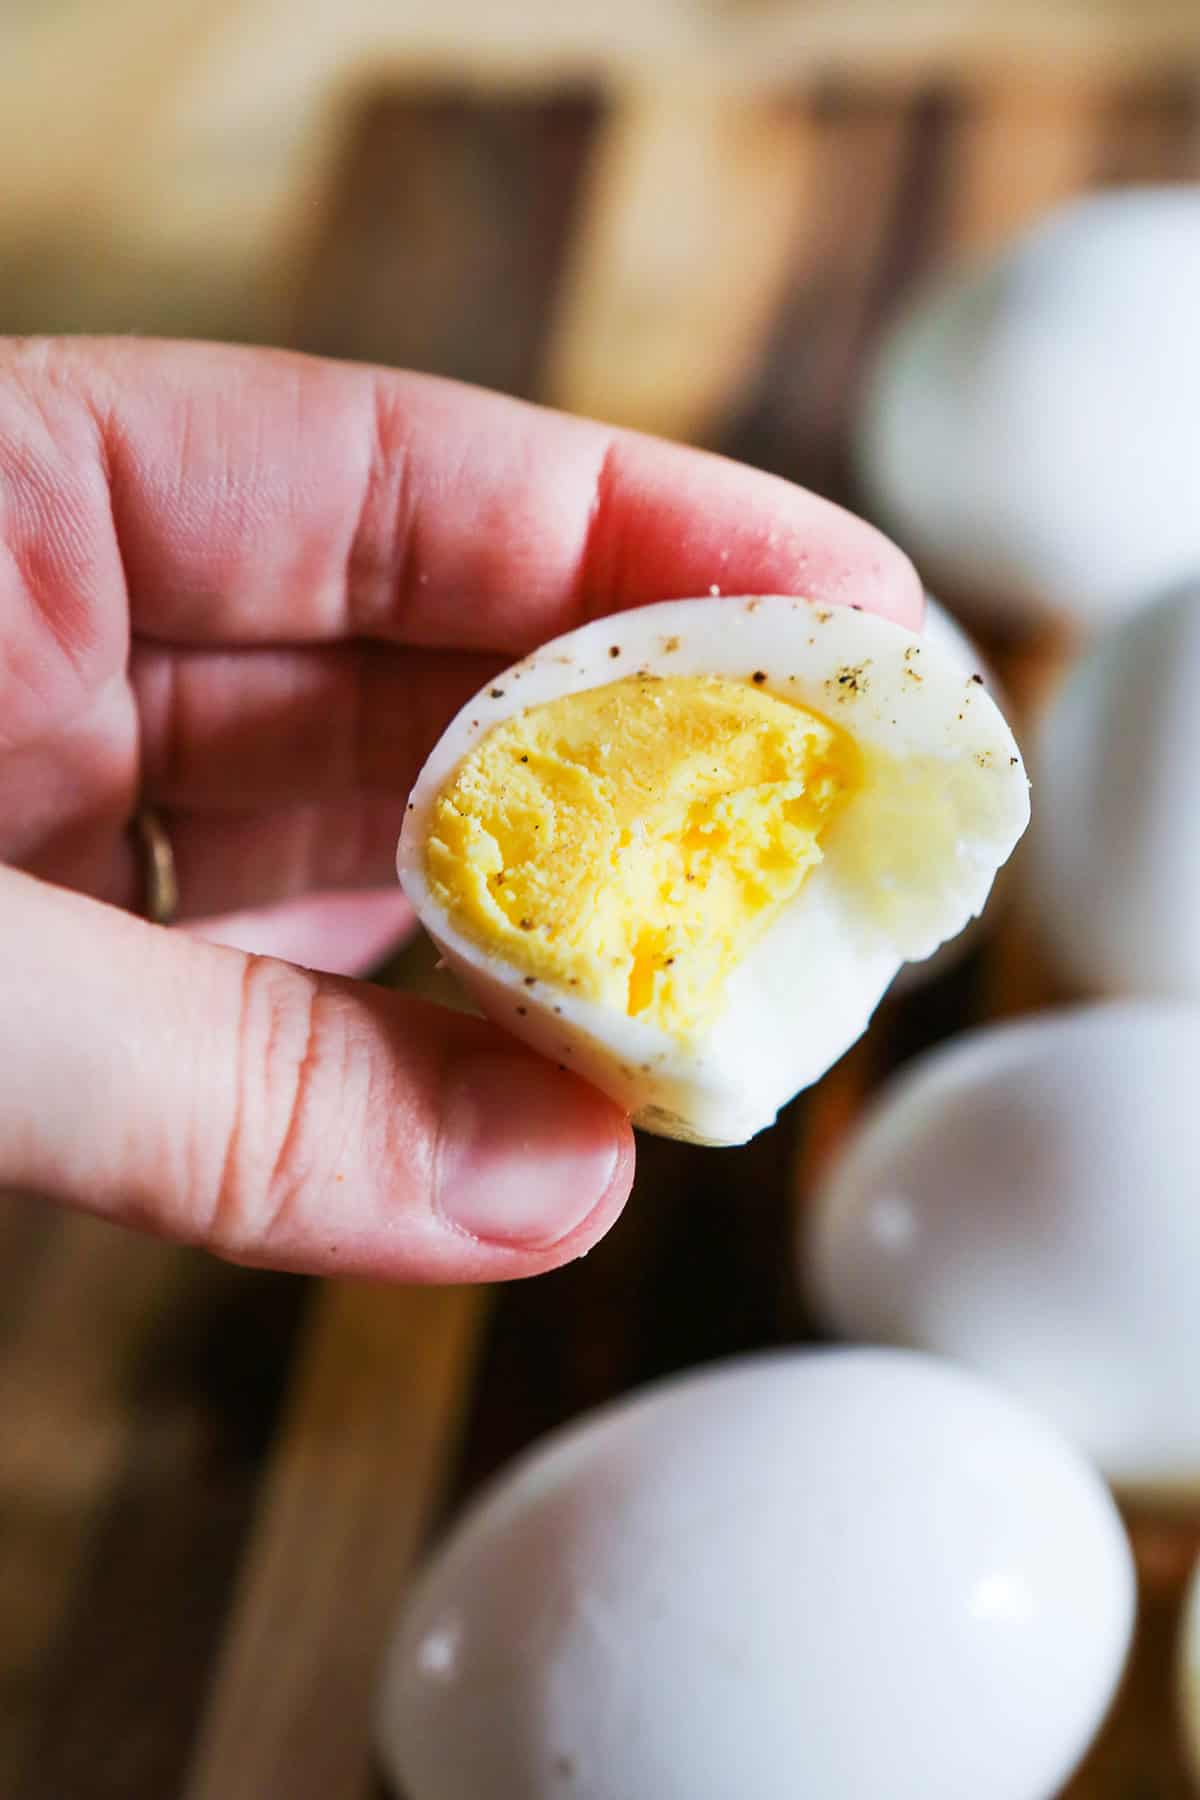
Eggs contain sulfur in their whites and iron in their yolks. When an egg is cooked for too long, or at too high a temperature, hydrogen sulfide gas is produced from the sulfur in the egg white. This gas then reacts with the iron in the yolk, creating iron sulfide, which is responsible for the greenish color and sometimes a slightly altered odor. While harmless, it's definitely not the aesthetic or texture we desire for perfect hard boiled eggs.
The key to preventing this reaction is precise timing and rapid cooling. By understanding these two factors, you're already well on your way to flaw-free results. The goal is to cook the egg just enough to solidify the white and yolk to your desired firmness, but not so much that the sulfur and iron have excessive time to react.
The Ultimate Method for Perfect Hard Boiled Eggs
There are several methods for boiling eggs, but for consistent results and to guarantee no green yolks, the "cold start" method followed by precise timing and an ice bath is largely considered superior. This approach minimizes the risk of overcooking and helps ensure easy peeling.
Step-by-Step Guide to Flawless Hard Boiled Eggs:
- Choose Your Eggs Wisely: Believe it or not, slightly older eggs (about 7-10 days past their packing date, but still well within their expiry) tend to peel more easily than very fresh eggs. This is because the pH of the egg white increases over time, making it less likely to stick to the inner membrane. However, even fresh eggs can be peeled with the right technique, which we'll cover later.
- Place Eggs in a Single Layer: Gently arrange your desired number of eggs in a single layer at the bottom of a saucepan. Avoid crowding, as this can lead to uneven cooking and increase the risk of cracking.
- Cover with Cold Water: Add cold tap water to the pot until the eggs are covered by about one inch of water. Adding eggs to already boiling water can shock them, potentially causing cracks.
- Add a Pinch of Salt (Optional): Some people add a pinch of salt to the water, believing it helps prevent cracking and makes peeling easier. While its effectiveness in preventing cracks is debated, it certainly doesn't hurt. A splash of white vinegar can also help coagulate the egg white quickly if a crack does occur, preventing a messy spill.
- Bring to a Rolling Boil: Place the pot on the stove over high heat and bring the water to a full, rolling boil. Watch it carefully to ensure it doesn't boil over.
- Turn Off Heat & Cover: As soon as the water reaches a full boil, immediately remove the pot from the heat. Cover the pot tightly with a lid.
- Let Them Sit (Timing is Key!): This is where the magic happens and where you control the doneness of your yolk. Do NOT lift the lid!
- 6-7 minutes: For a soft-boiled egg with a runny yolk and just-set white.
- 8-9 minutes: For a medium-boiled egg with a creamy, jammy yolk.
- 10-12 minutes: For perfect hard boiled eggs with a firm, uniformly colored yolk that's fully cooked but not chalky, and absolutely no green ring.
- 13-15 minutes: For very firm yolks, if that's your preference. Beyond 12 minutes, you risk the green ring, especially if your stove retains heat very well.
For a more in-depth exploration of timing and precise steps, you might find our article Master Perfect Hard Boiled Eggs: A Step-by-Step Guide incredibly helpful.
- Prepare an Ice Bath: While your eggs are resting, prepare a large bowl of ice water. This isn't just cold water; it should be at least half ice, half water to ensure rapid cooling.
- Transfer to Ice Bath Immediately: As soon as the timer goes off, use a slotted spoon to carefully transfer the eggs from the hot water directly into the ice bath. This step is CRUCIAL. The ice bath immediately halts the cooking process, preventing overcooking and the formation of the green ring. It also helps the egg whites contract, which makes peeling significantly easier.
- Chill for at least 5-10 minutes: Allow the eggs to cool completely in the ice bath. You can even leave them there for up to 15 minutes.
Beyond the Boil: Peeling and Storing Your Perfectly Cooked Eggs
Congratulations! You've successfully cooked your eggs to perfection. Now for the equally important, and often frustrating, next steps: peeling and storing.
Effortless Peeling Techniques:
Even with perfectly cooked eggs and an ice bath, some eggs can still be stubborn. Here are some tips for perfectly peelable hard-boiled eggs:
- Peel Under Cold Water: Once fully chilled, crack the egg all over by gently tapping it on a hard surface or rolling it between your palms. Start peeling at the wider end of the egg, where the air pocket is typically located. Peeling under a gentle stream of cold running water can help the water get under the membrane, making it easier to separate from the egg white.
- Roll, Don't Pick: After cracking, gently roll the egg on a flat surface to further break up the shell into small pieces. This often allows the shell to come off in larger sections, along with the membrane.
- The Spoon Method: Some find success by cracking the wider end, then carefully sliding a small spoon between the egg white and the shell membrane, gently rotating it around the egg to separate the shell.
For more detailed strategies and troubleshooting tips on stubborn shells, be sure to check out our article Secrets to Perfectly Peelable Hard Boiled Eggs Revealed.
Storing Your Perfect Hard Boiled Eggs:
Once peeled, hard-boiled eggs should be stored in an airtight container in the refrigerator and consumed within 5-7 days. If you plan to store them for a few days, it's often best to leave them unpeeled until just before use, as the shell provides a natural protective barrier. Unpeeled hard-boiled eggs also last about a week in the fridge.
Common Hard Boiled Egg Problems and Quick Fixes
Even with the best intentions, things can sometimes go awry. Here’s a quick troubleshooting guide:
- Green Ring: This is almost always due to overcooking or insufficient rapid cooling. Ensure you stick to the recommended cooking times (10-12 minutes for firm yolks) and always use an immediate ice bath.
- Rubbery Whites: Another sign of overcooking. The proteins in the egg white tighten up too much when exposed to high heat for too long, resulting in a rubbery, unpleasant texture. Stick to the timing!
- Cracked Shells During Boiling: This can happen if eggs are added directly to boiling water, if the pot is too crowded, or if very fresh eggs are used without tempering. Starting with cold water, not overcrowding, and potentially adding a pinch of salt or vinegar can help.
- Stuck Shells/Difficult Peeling: This is often linked to very fresh eggs, improper cooling (skipping the ice bath!), or simply bad luck. Chilling thoroughly in an ice bath is the most critical step to aid peeling.
Conclusion
Achieving perfect hard boiled eggs without the frustration of green yolks or stubborn shells is entirely within your grasp. By following the simple, scientifically-backed method of starting with cold water, precise timing off the heat, and an immediate ice bath, you can guarantee consistently beautiful, firm yet creamy yolks and tender whites every single time. Hard-boiled eggs are a versatile, nutritious, and convenient food, and now you have the tools to make them flawlessly. Experiment with the timing to find your ideal yolk consistency, practice your peeling technique, and get ready to enjoy truly perfect hard-boiled eggs in all your culinary creations!
